#1 Introduction to C++, Installing VS Code, g++ & more | C++
In these C++ tutorials, we are going to learn about the C++ programming language from the very basics to the industry level. This course has been designed in a way to nurture the beginners setting the
Before starting, let me explain to you the difference between this and any other source for learning C++:
This is a whole complete package in itself, covering from A to Z of the language.
No redundancy and monotonicity.
Beginner friendly, hence easy to learn.
No prerequisite, just a zeal for learning.
To start with, I’ll be covering these things in today’s tutorial:
What is programming and why C++?
Installation of Visual Studio Code
Installation of g++
Writing our first program and executing it.
What is programming, programming language, and why C++?
Programming can be understood as your instructions to the computer(machine) to solve real problems. The very basic principle of creating machines was to make life simpler and machines, on our instructions, have been able to do the same. But the distance between what we say and what the machine understands gets abridged by a programming language. This marks the importance of learning a programming language.
A programming language helps us communicate with the computer. Analogous to us humans, who need some language, be it English, Hindi, or Bangla, to talk to our people, computers too need a language to converse. Just to name a few, there is C++, C, Python, Java, etc.
Now when we start listing the names of these programming languages, the question which instinctively arises is why C++. Despite this being an 80s programming language, it never lost its sheen. C++ was an added version of C developed by Bjarne Stroustrup. It is believed to be very close to the hardware making it comparatively easy for programmers to give the instructions directly to the system without any intermediary. Another reason for C++ to be one of the most used languages is its object-orientedness. C++ is an object-oriented programming language giving it the power to create real-world software systems. You don’t have to worry much about these terms, which believe me, only sound complex and ain’t really! Just sit back and dive with me in this plethora of knowledge.
Installation of Visual Studio Code
Visual studio is a source code editor - free to use, provided & maintained by Microsoft. Below is the process of downloading and installing visual studio code:
Step 1: Click here and you will be redirected to the official download page of VS Code. Download the VS code according to your operating system in use. I will be downloading it for Windows 10 as shown in the below animation.

Figure 1: Visual Studio Code WebsiteFigure 1: Visual Studio Code Website
Step 2: Once the downloading is complete, install VS code on your system like any other application.
Installation of g++
g++ is a compiler that helps us convert our source code into a .exe file. Below is the process of downloading and installing g++:
Step 1: Go to Google and search "MinGW install" and click on the MinGW link, as shown in the image below.

Figure 4: g++ installation from Google
Step 2: Click on the download button on the top right corner menu.

Figure 5: G++ Download Step
Step 3: After visiting the download page, click on the windows button as shown in the image below to start the downloading
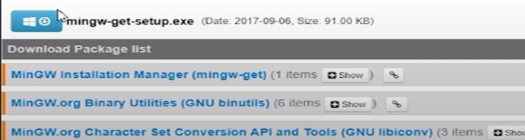
Figure 6 G++ Download Step
Step 4: After the download - open the program and click "Continue" to start the installation process.
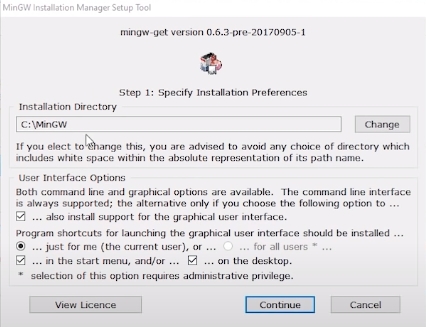
Figure 7: G++ Installation Step
Step 5: After downloading some packages, it will show you a screen, as shown in the image below. You have to mark both the boxes as in the image below, and then click on installation on the top left corner menu. Finally, click apply changes, and it will start downloading the required packages.
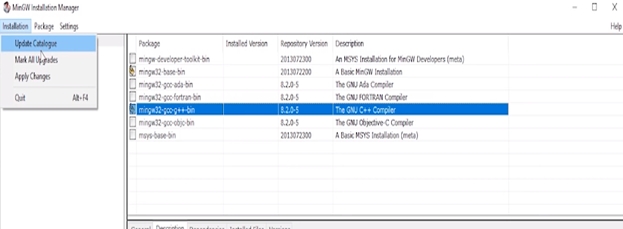
Figure 8: G++ Installation Step
Step 6: After finishing step 5, close the program and open C:// drive. Furthermore, locate the MinGW folder. Go to its bin directory and copy its file path, as shown in the image below.
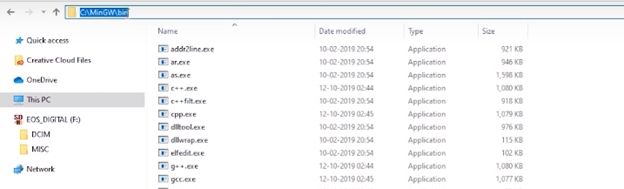
Figure 9: Copying g++ file path
Step 7: Now right-click on this pc and go to properties
Step 8: After that click on advanced system settings as shown in the image below
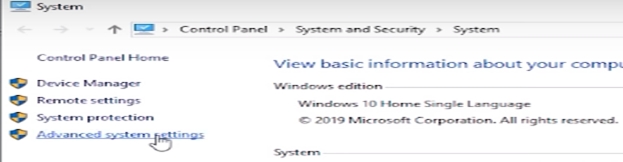
Figure 10: Step to Add g++ File Path
Step 9: After that click on "Environment Variables" as shown in the image below
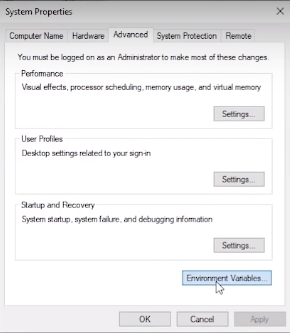
Figure 11: Step to Add G++ File Path
Step 10: After that select path and click on edit as shown in the image below
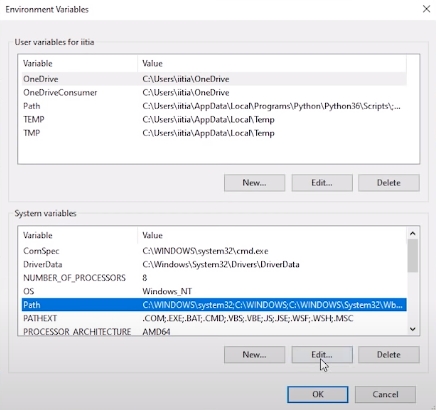
Figure 12: Step to Add g++ file path
Step 11: Then, click on new and paste the file path and click ok as shown in the image below
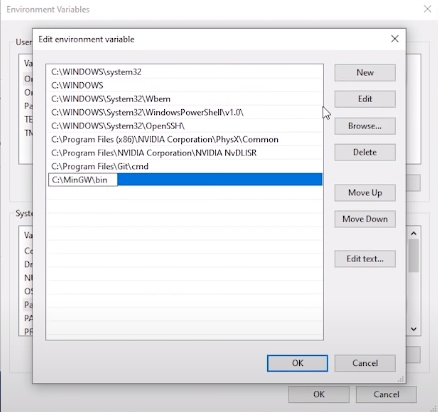
Figure 13: Adding g++ File Path
After adding the file path now, our g++ compiler is ready, and we can start coding now.
Writing Our First Program and Executing It
To write our first program, we need Visual studio code, which is a source code editor. Create a folder and then right-click inside the folder and click on "open with code" as shown below:
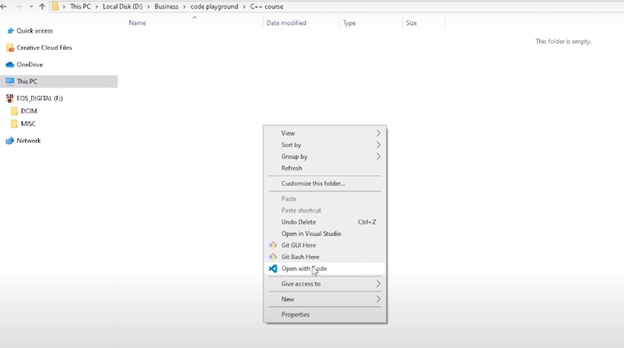
Figure 14: Opening Visual Studio Code in a folder
Following these steps will open your visual studio code with that folder as the context. After opening the VS Code, you have to install some extensions. Go to the extension menu and search "C/C++," and it will show you this extension. C/C++, as well as the other extensions we add, will make our life easy while learning C++. Click on the install button, and it will start installing the extension for you, as shown in the image below.
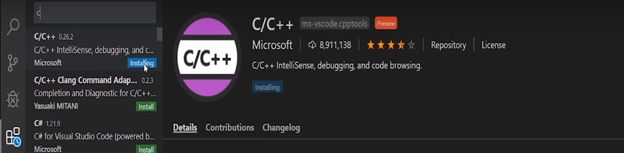
Figure 15: Installing Extension
This extension will help us in writing code through features such as auto-complete or auto-dropdown suggestions. Let us install one more extension, which will help us run our programs quickly. Go to the Extensions tab in the top left corner and search "Code runner." After that, click on install.
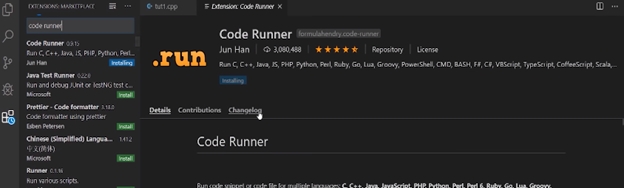
Figure 16: Installing Extension
Now we have to create our program file and start writing our code. To create a program file, you have to go to the File menu > then click on the file button, as shown in the image below.

Figure 17: Creating a Program File
After clicking on the file button, it will ask you for the file name. Give the name of the file as "tutorial1.cpp" and press enter. Now the code file will be created, and you can start writing your program.
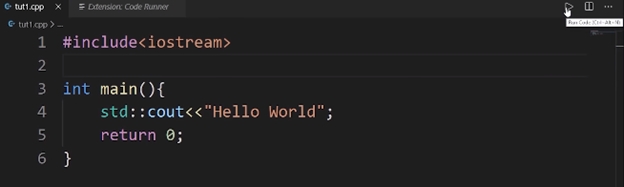
Figure 18: Running Code
In today's tutorial, we are not going to learn anything about what this code is all about. We will learn these things step by step in our upcoming lectures. Now to execute this code, press the run button, as shown in the image above, and it will give you the output as shown in the image below.
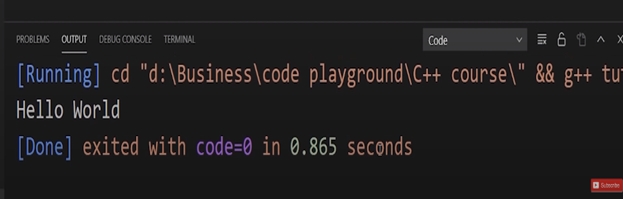
Figure 19: Program Output
Thank you friends for starting to learn C++ with me, hope you liked the tutorial.
In the next tutorial, we’ll be talking more about the basic structures of a C++ program, see you there, till then keep coding.
Code as described
// Some code
#include<iostream>

int main(){
    std::cout<<"Hello World";
    return 0;
}
Last updated